
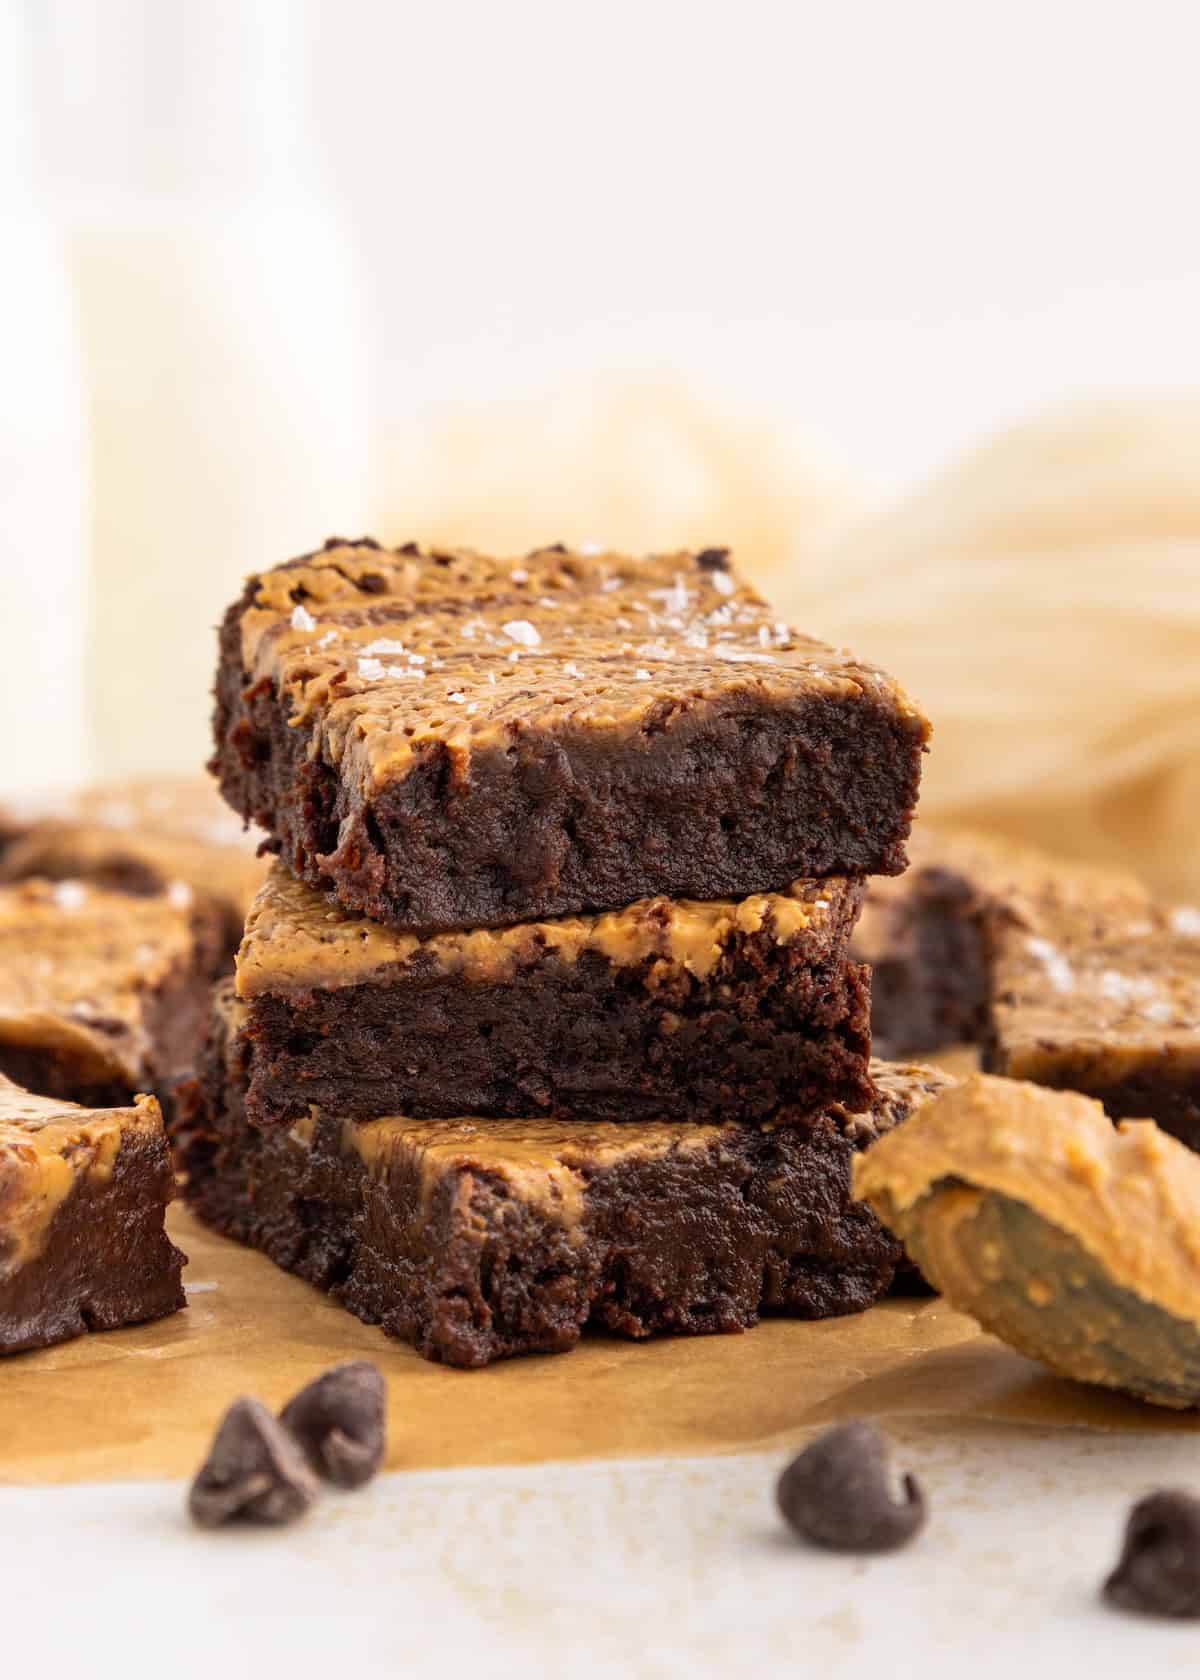
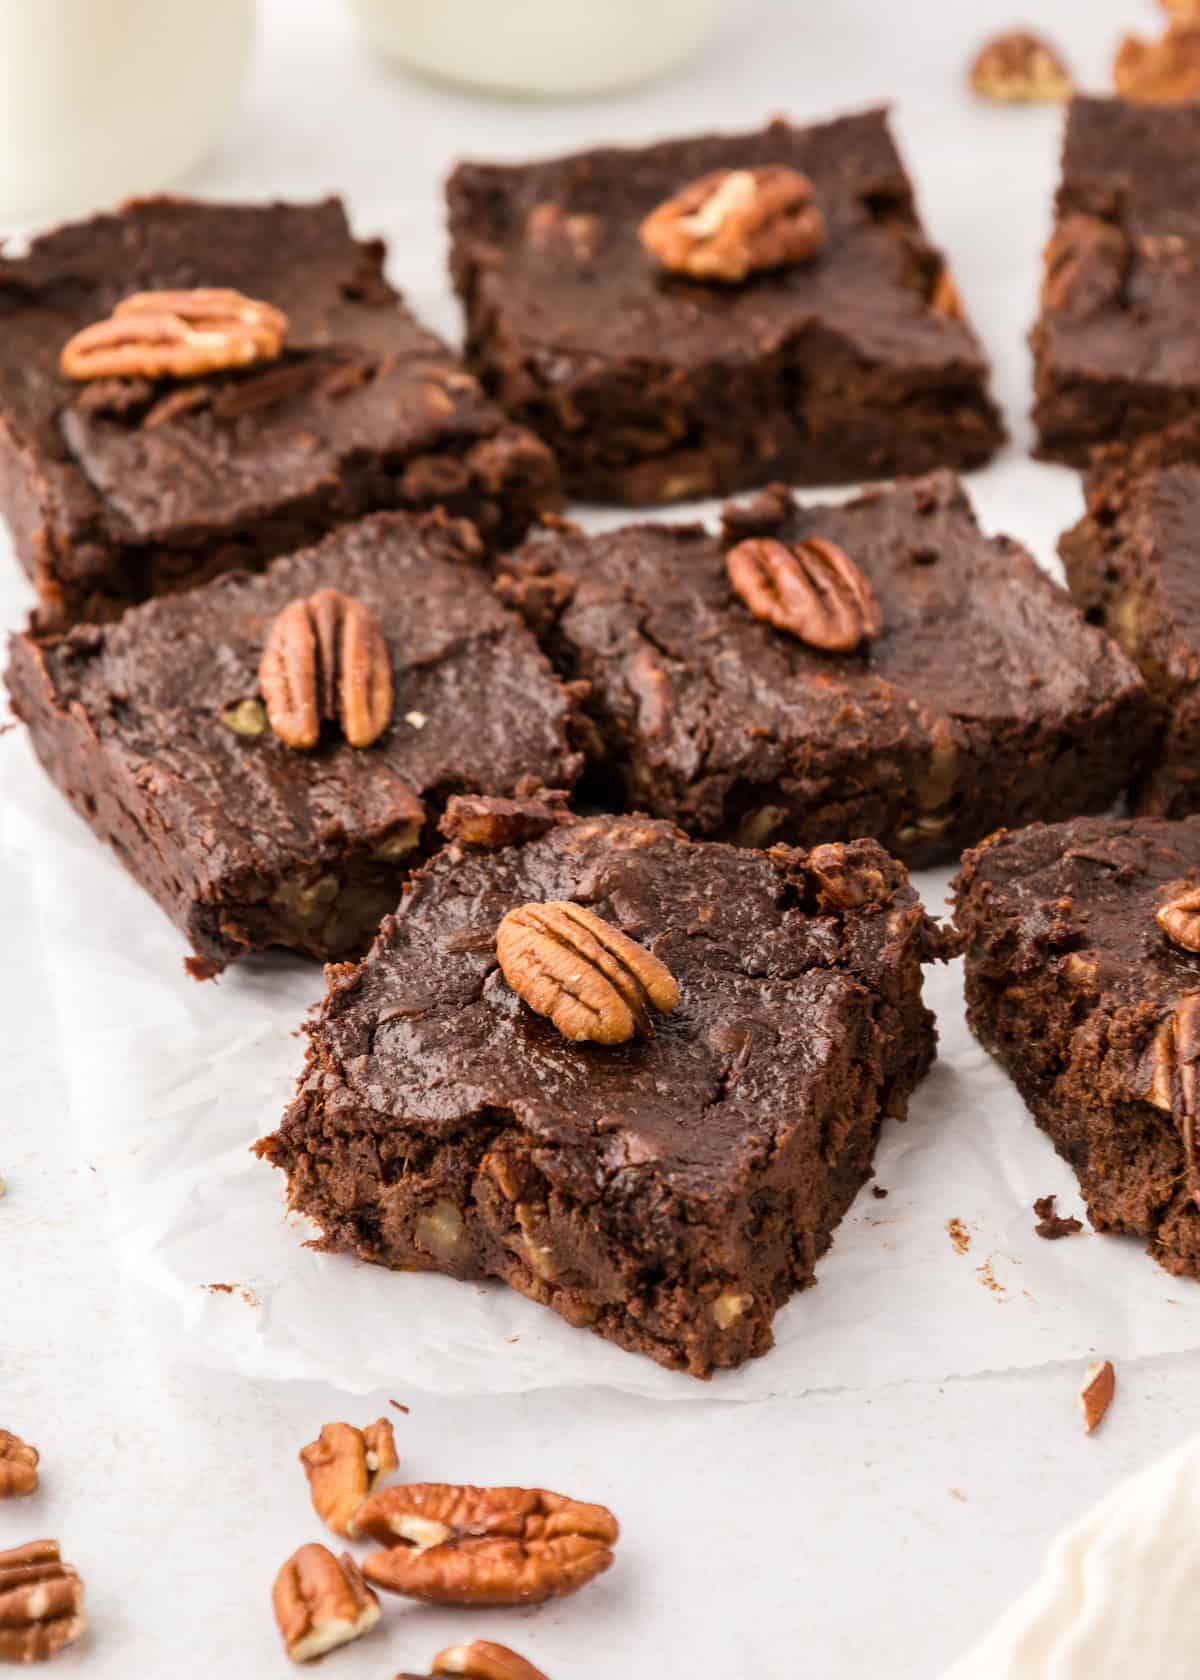
These Gluten-Free Peanut Butter Brownies are rich, fudgy, and made for anyone who loves the classic chocolate and peanut butter combination. They have that dense brownie texture you want, with creamy peanut butter swirled through each bite.
A Quick Look at the Recipe
✅ Recipe Name: Gluten-Free Peanut Butter Brownies
🕒 Ready In: ~40 minutes, plus cooling
👪 Serves: 9 brownies
🍽 Calories: ~340 per serving estimated
🥣 Main Ingredients: Oat flour, cocoa powder, chocolate chips, maple syrup, eggs, creamy peanut butter
📖 Dietary Info: Gluten-free; naturally sweetened
👌 Difficulty: Easy: mix, swirl, bake
SUMMARIZE & SAVE THIS CONTENT ON
Instead of feeling dry or overly "healthy," these gluten-free brownies bake up soft, chocolatey, and satisfying. The peanut butter adds just enough salty-sweet flavor to balance the richness, making them feel like a real dessert.
They're easy enough for a weeknight dessert but good enough to share for holidays, potlucks, or whenever you need a healthier chocolate treat. If you love simple gluten-free desserts, try these with our Gluten-Free Coffee Cake, Chocolate Raspberry Tart, or Peanut Butter Oat Cups next.
Jump to:
- A Quick Look at the Recipe
- Why You'll Love Gluten-Free Peanut Butter Brownies:
- Key Ingredients:
- Easy Substitutions & Variations:
- How to Make Gluten-Free Peanut Butter Brownies:
- Recipe Notes & Tips:
- How to Store:
- Gluten-Free Peanut Butter Brownies FAQs:
- More Dessert Recipes You'll Love
- Get a FREE Healthy Meal Planning Ebook
- Gluten-Free Peanut Butter Brownies
Why You'll Love Gluten-Free Peanut Butter Brownies:
Rich and Fudgy: These brownies bake up dense, chocolatey, and soft in the center.
Classic Chocolate Peanut Butter Flavor: The creamy peanut butter swirl adds the perfect salty-sweet balance.
Naturally Sweetened: Maple syrup gives these brownies just enough sweetness without refined sugar.
Easy Gluten-Free Dessert: Simple ingredients and a quick swirl make this an easy brownie recipe for any day.
Key Ingredients:
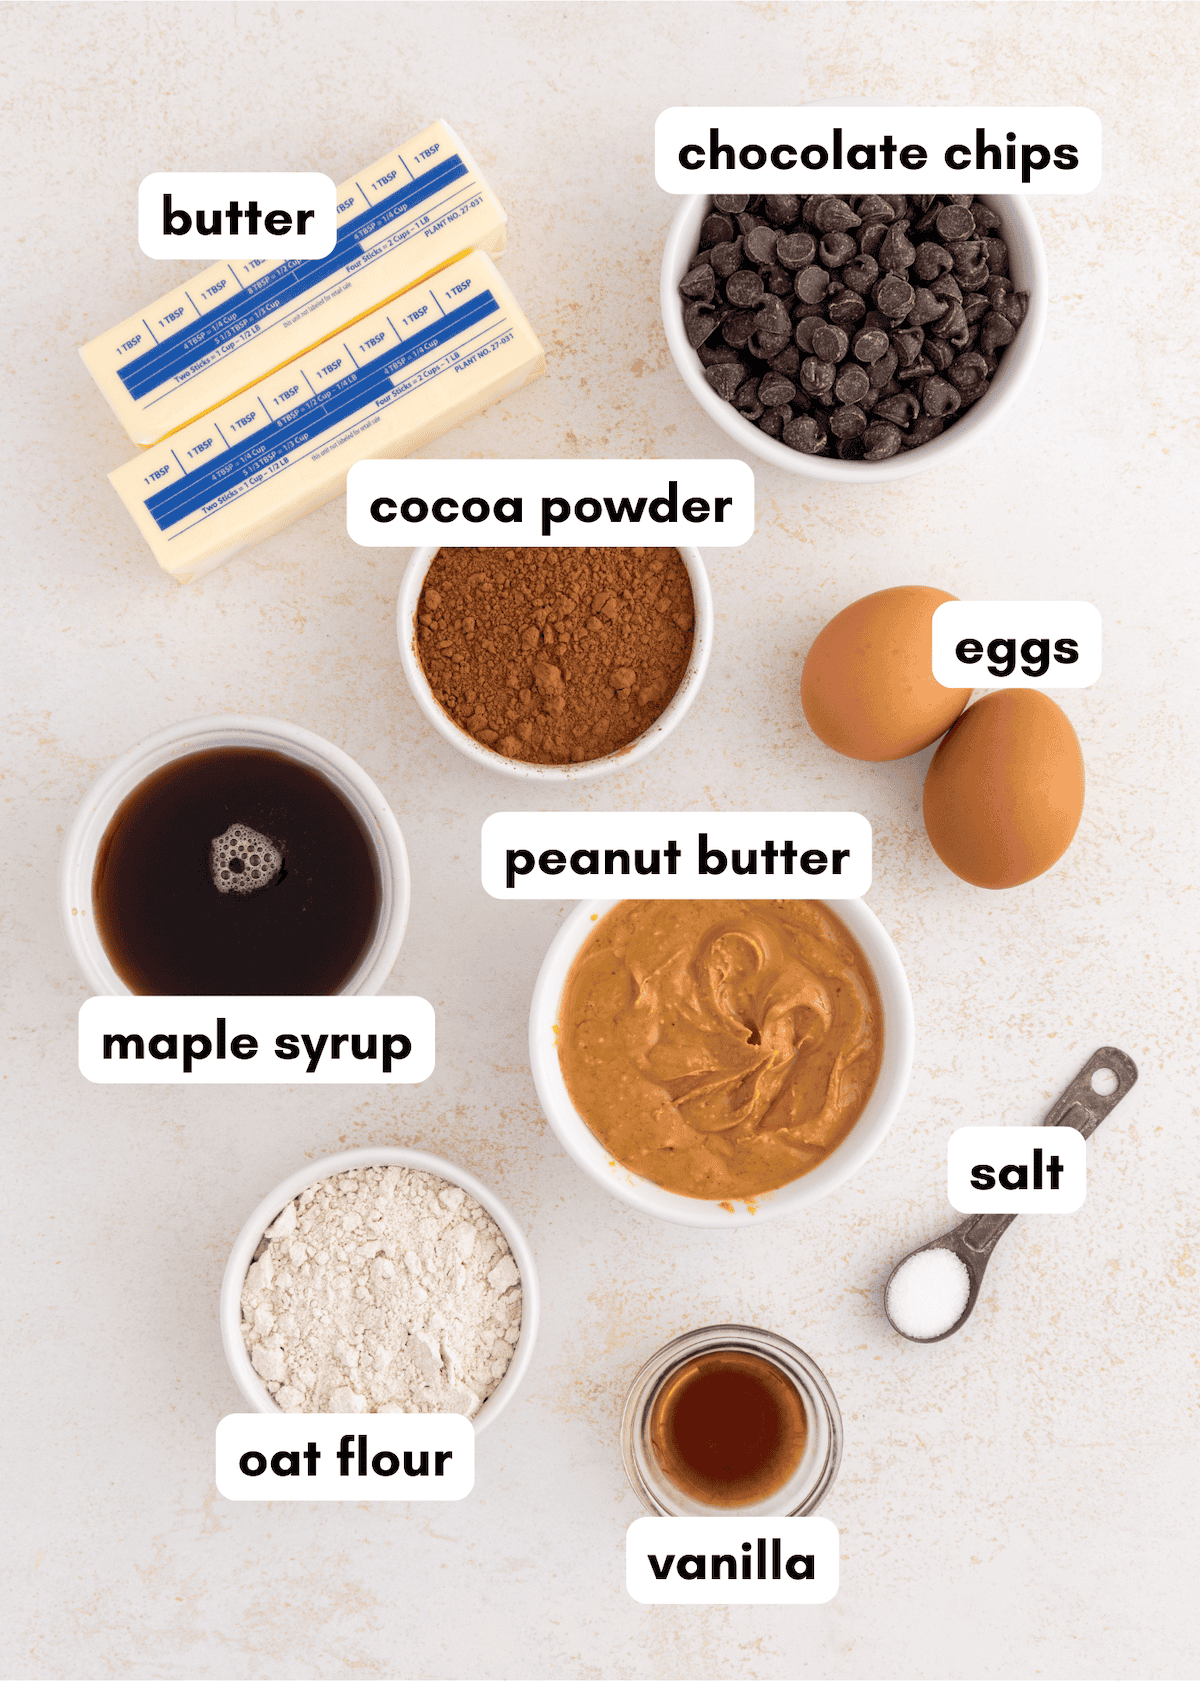
- oat flour. This gives the brownies structure while keeping the texture soft and tender. Use certified gluten-free oat flour if needed.
- cocoa powder. Adds deep chocolate flavor and helps create that rich brownie taste.
- semi-sweet chocolate chips. These melt into the batter for a fudgier texture and extra chocolate flavor.
- maple syrup. Adds natural sweetness and helps keep the brownies soft.
- creamy peanut butter. This gets swirled on top for that classic chocolate peanut butter flavor in every bite.
Scroll to the recipe card at the bottom of this page for exact quantities.
Easy Substitutions & Variations:
- Make it dairy-free: Use a dairy-free butter alternative and dairy-free chocolate chips.
- Add extra chocolate: Stir a handful of chocolate chips into the batter before adding the peanut butter swirl.
- Use a different nut butter: Almond butter or cashew butter can be used instead of peanut butter, but the flavor and texture will change slightly.
- Add chopped nuts: Chopped peanuts, walnuts, or pecans can be stirred into the batter for a little crunch.
- Make them extra rich: Sprinkle a few chocolate chips on top before baking with the peanut butter swirl.
How to Make Gluten-Free Peanut Butter Brownies:
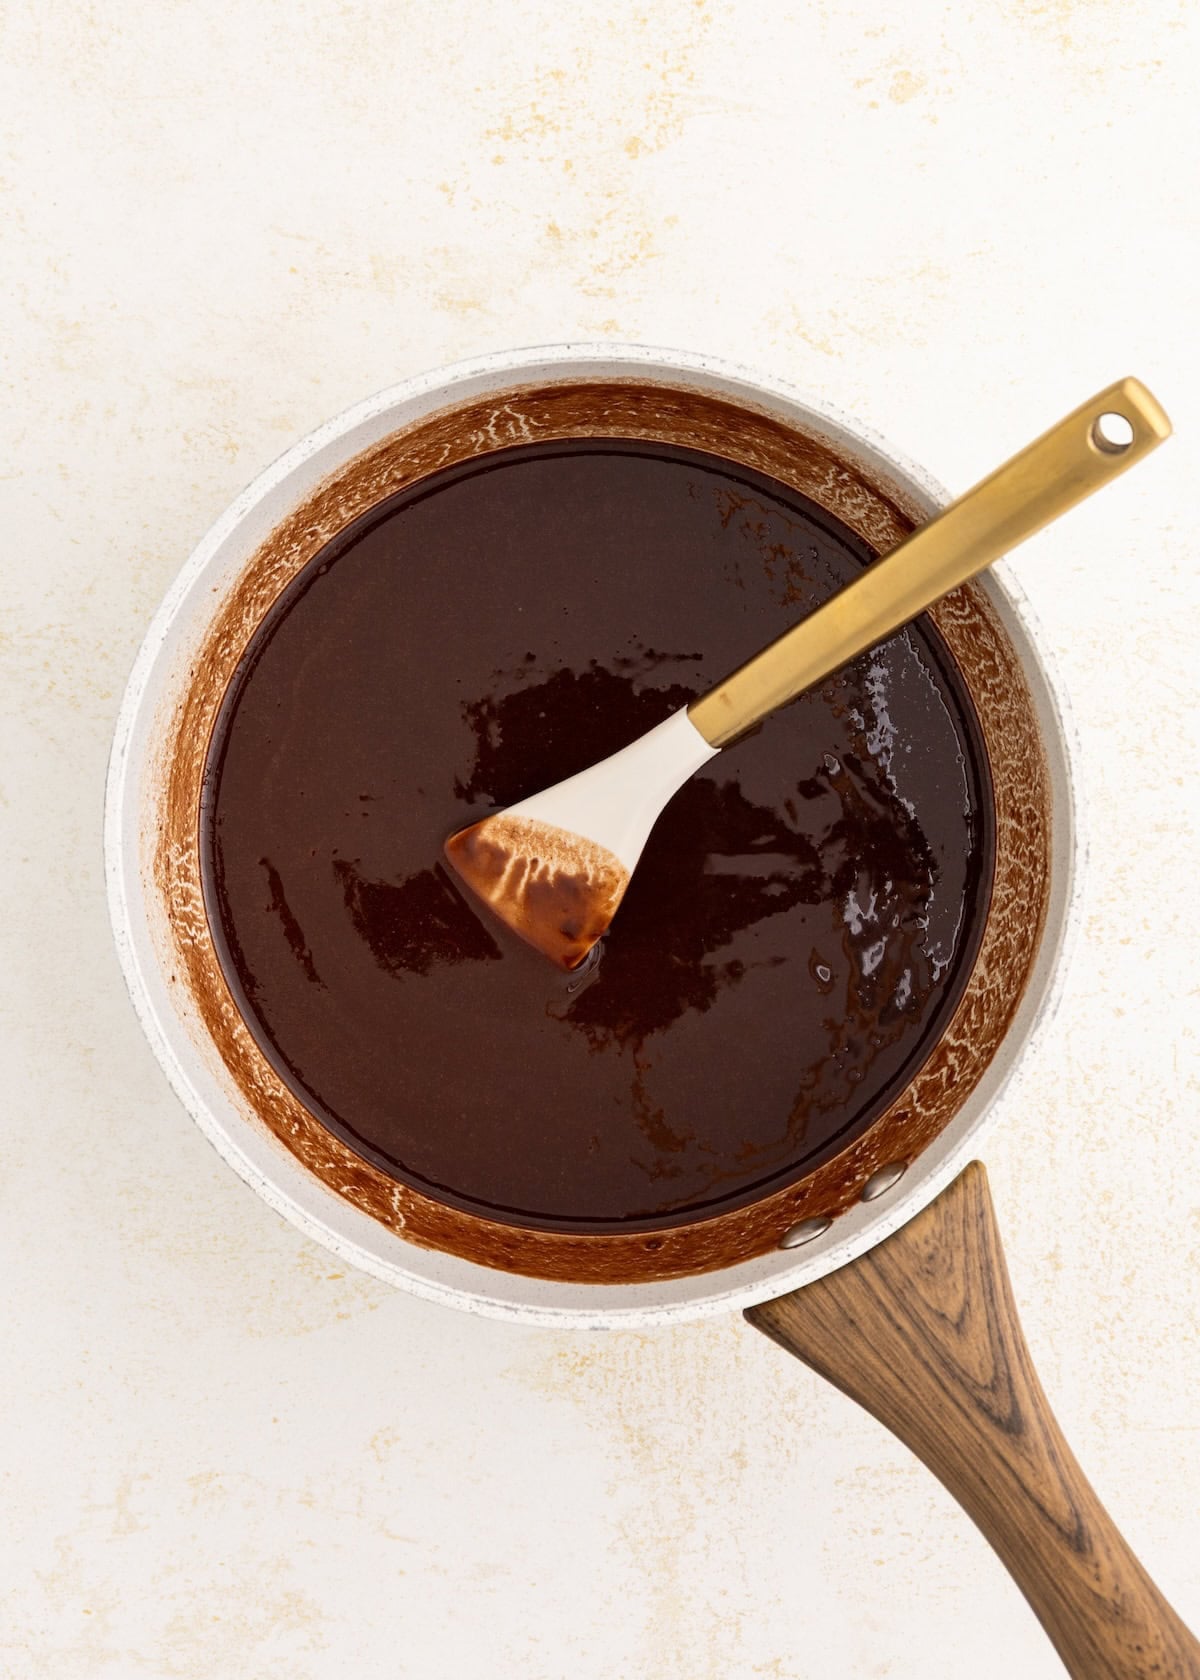
- Step 1: Preheat the oven to 350°F. Line an 8x8 baking pan with parchment paper. In a medium saucepan over low heat, melt the butter and semi-sweet chocolate chips together.
- Step 2: Remove from the heat and let it cool slightly. Whisk the maple syrup, eggs, and vanilla extract into the melted chocolate mixture until smooth.
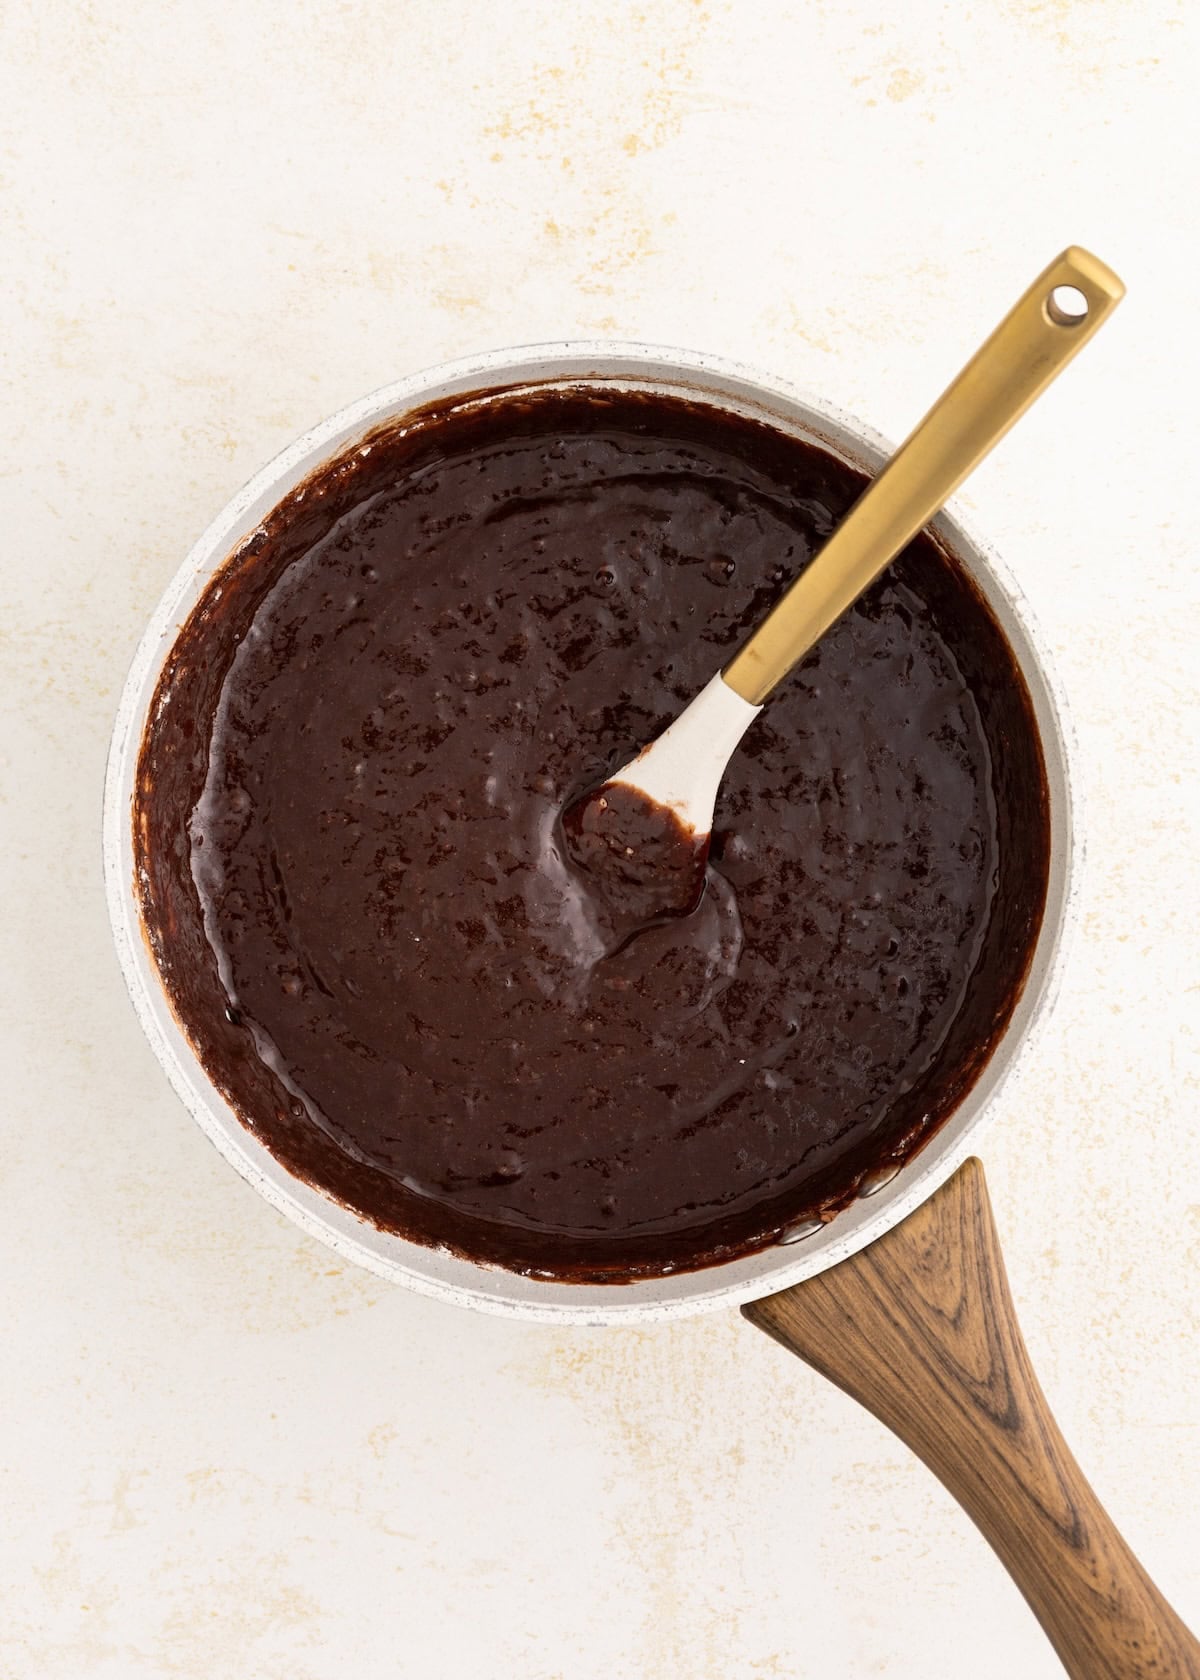
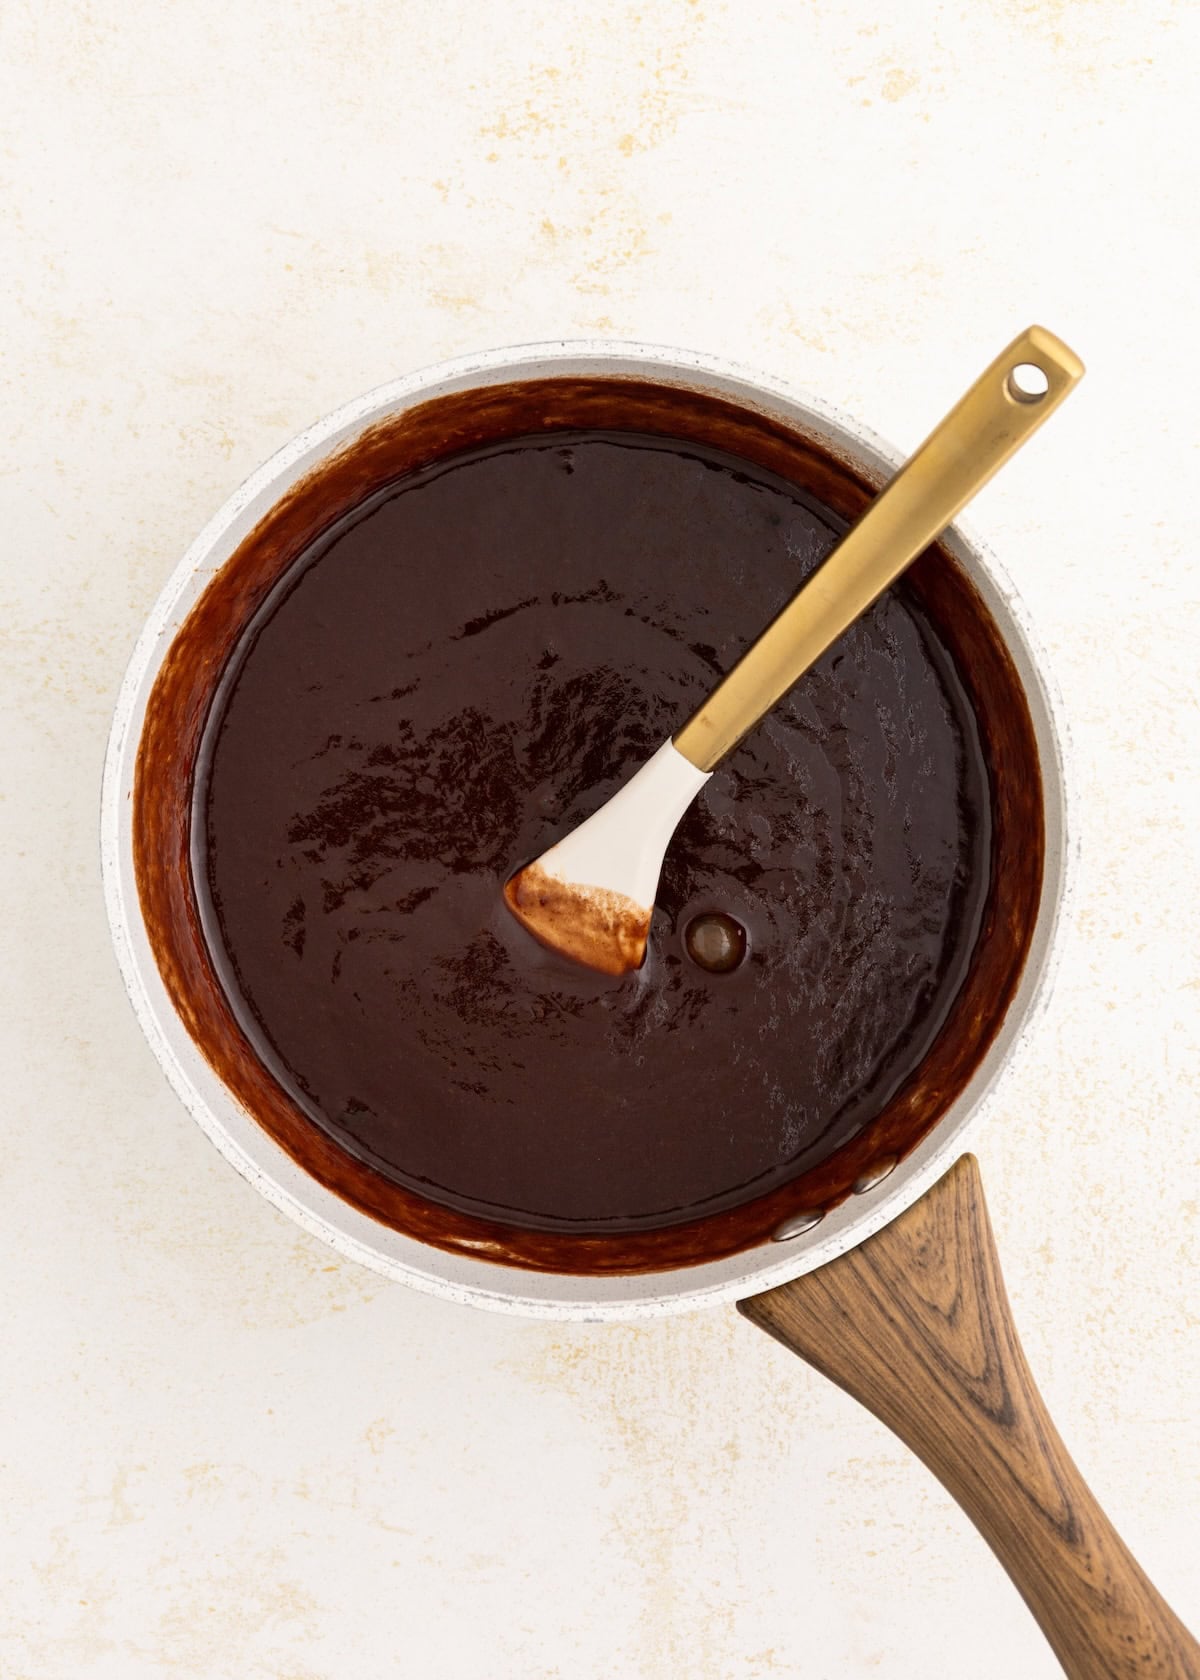
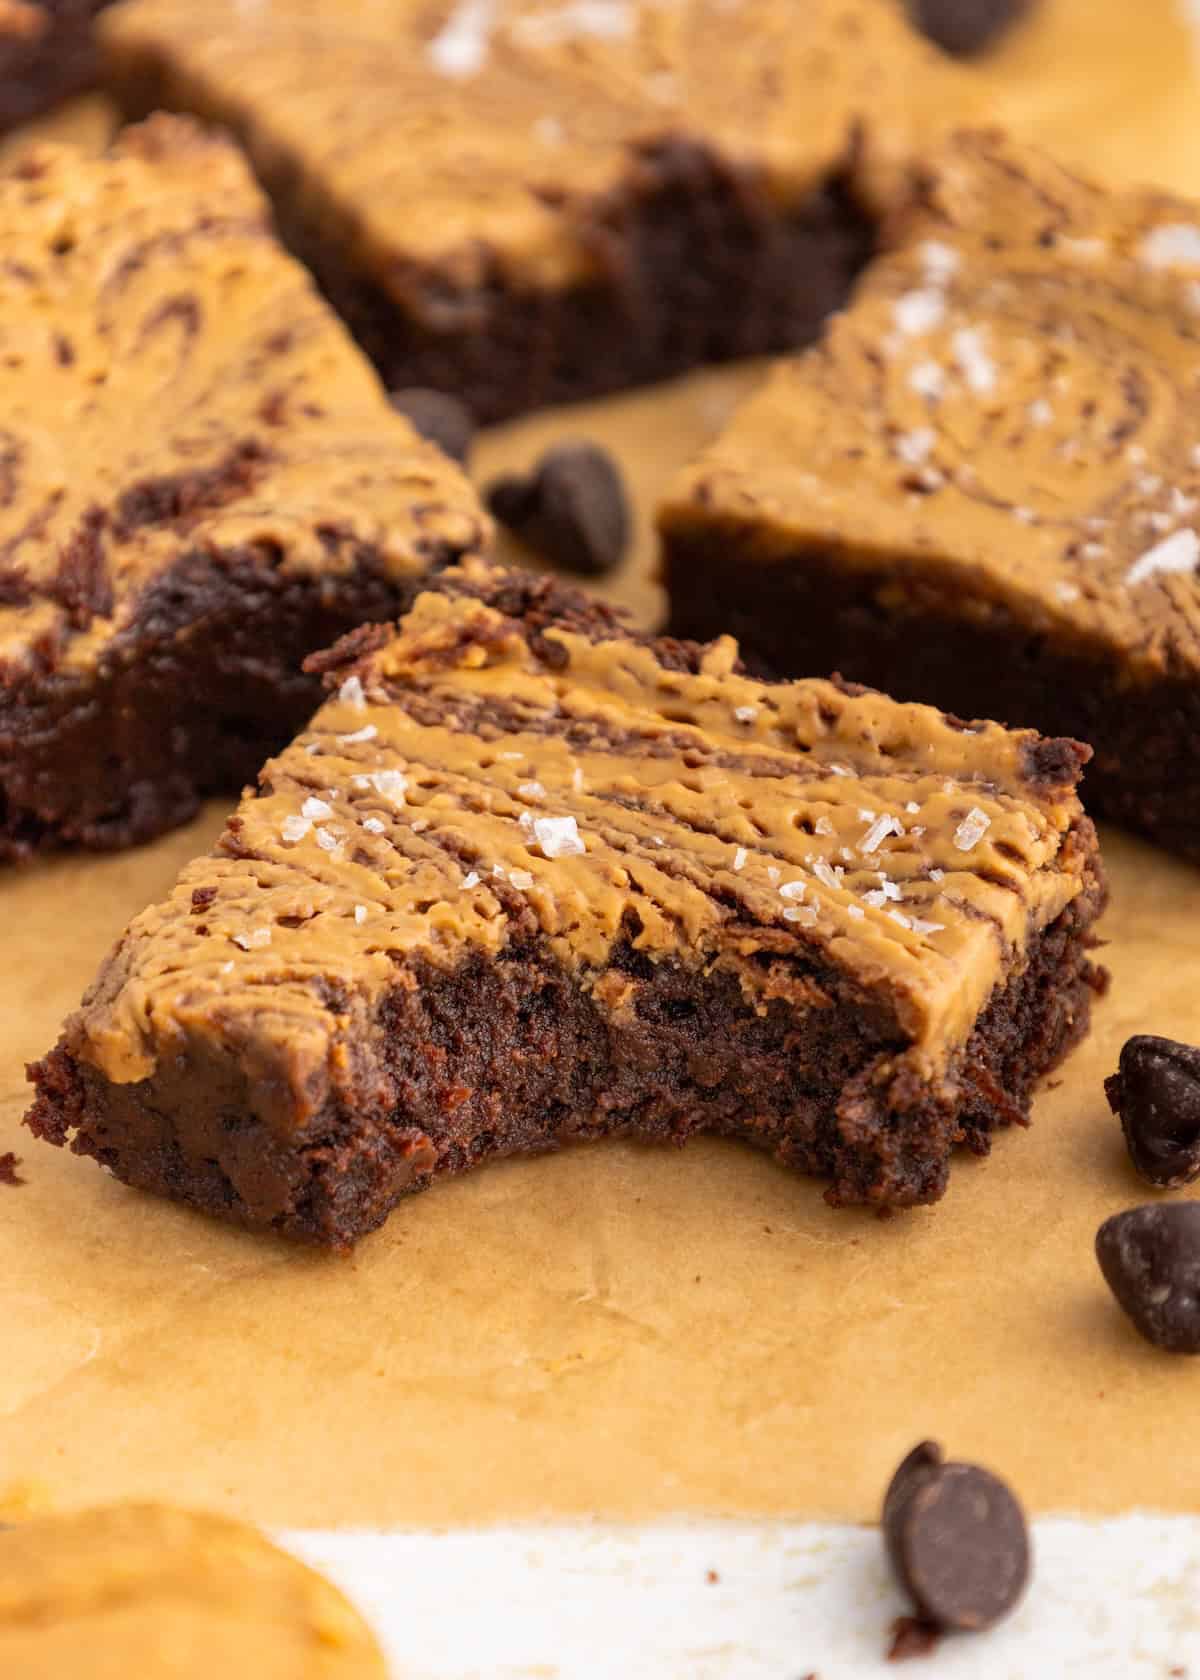
- Step 3: Stir in the oat flour, cocoa powder, and salt until just combined. Pour the brownie batter into the prepared pan and spread it evenly. Drop spoonfuls of creamy peanut butter over the top, then gently swirl it into the batter with a butter knife or toothpick.

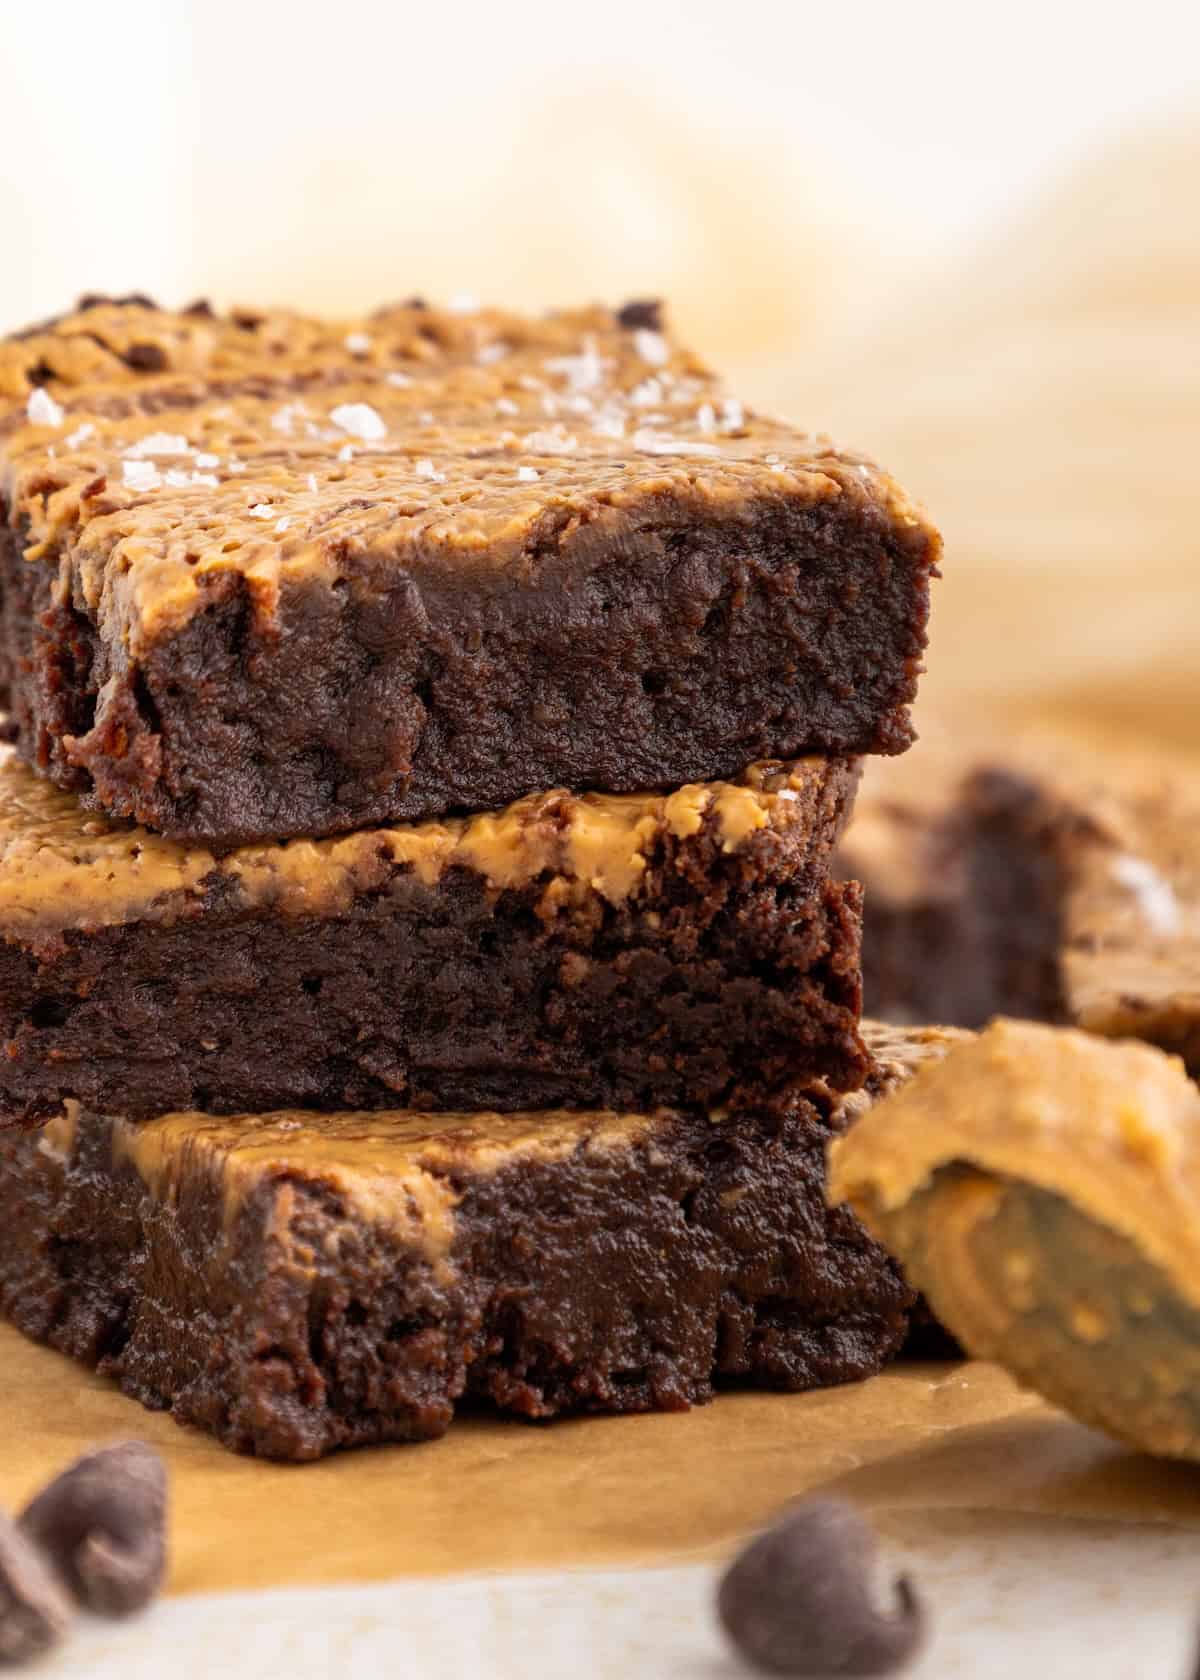
- Step 4: Bake for 25-30 minutes, or until the edges are set and the center no longer jiggles. A toothpick inserted near the center should come out with moist crumbs. Let the brownies cool completely in the pan before lifting them out and slicing into squares.
Save this Recipe
Recipe Notes & Tips:
- Do not over mix the batter: Stir just until the oat flour, cocoa powder, and salt are combined so the brownies stay soft and fudgy.
- Use creamy peanut butter: Creamy peanut butter works best for swirling. If using natural peanut butter, make sure it is very well stirred so it does not separate or leave oily spots.
- Do not over bake: Pull the brownies when the edges are set and the center no longer jiggles. A toothpick should come out with moist crumbs, not completely clean.
- Let them cool completely: Gluten-free brownies need time to set, so let them cool before slicing for the best texture.
- Use certified gluten-free oat flour: If you need the recipe to be fully gluten-free, make sure your oat flour is labeled certified gluten-free.
How to Store:
Room Temperature: Store the gluten-free peanut butter brownies in an airtight container at room temperature for up to 3 days.
Refrigerator: Store them in the refrigerator for up to 5 days if you want them to last longer. They will be firmer when chilled.
Freezer: Freeze the brownies in a freezer-safe container for up to 2 months. Thaw at room temperature or in the refrigerator before serving.
Gluten-Free Peanut Butter Brownies FAQs:
Creamy no-stir peanut butter works best because it swirls smoothly and holds its texture as the brownies bake. Natural peanut butter can work if it is very well stirred, but runny or oily peanut butter may sink into the batter or leave greasy spots on top.
The edges should look set, the center should no longer jiggle, and a toothpick inserted near the center should come out with moist crumbs. A completely clean toothpick usually means they are over baked.
They can turn dry or crumbly if they are over baked, sliced before they cool, or made with too much oat flour. For the best fudgy texture, measure the flour carefully, pull them from the oven while the center is still slightly soft, and let them cool completely before slicing.
Grab your free copy
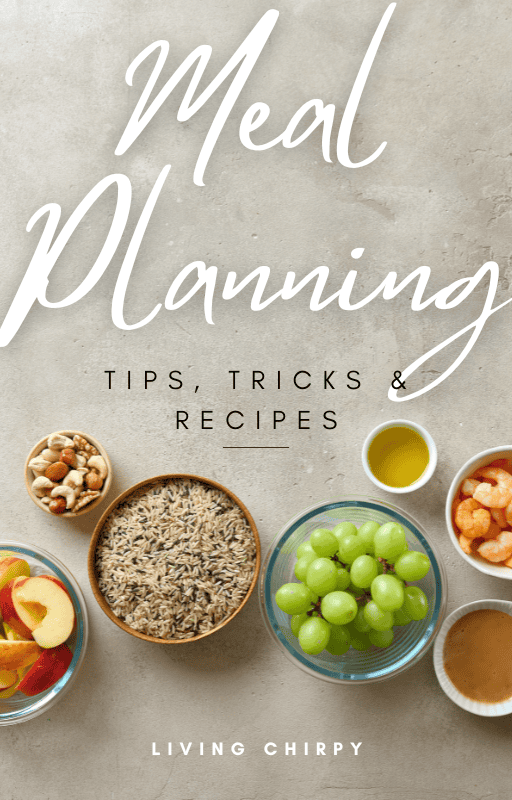
Get a FREE Healthy Meal Planning Ebook
Tips, Tricks, and Recipes for Stress Free Meal Planning
Gluten-Free Peanut Butter Brownies
Ingredients
- 1 cup butter
- 1 cup semi-sweet chocolate chips
- ½ cup maple syrup
- 2 eggs
- 1 teaspoon vanilla extract
- ⅔ cup oat flour
- ½ cup cocoa powder
- ½ teaspoon salt
- 1 cup creamy peanut butter
Instructions
- Preheat the oven to 350°F. Line an 8x8 baking pan with parchment paper and lightly grease it.
- In a medium saucepan over low heat, melt the butter and semi-sweet chocolate chips together, stirring often until smooth. Remove from the heat and let it cool slightly.
- Whisk the maple syrup, eggs, and vanilla extract into the melted chocolate mixture until smooth.
- Stir in the oat flour, cocoa powder, and salt until just combined. The batter should be thick and glossy.
- Pour the brownie batter into the prepared pan and spread it evenly. Drop spoonfuls of creamy peanut butter over the top, then gently swirl it into the batter with a butter knife or toothpick.
- Bake for 25-30 minutes, or until the edges are set and the center no longer jiggles. A toothpick inserted near the center should come out with moist crumbs.
- Let the brownies cool completely in the pan before lifting them out and slicing into squares.
Nutrition
Notes
- Do not over mix the batter: Stir just until the oat flour, cocoa powder, and salt are combined so the brownies stay soft and fudgy.
- Use creamy peanut butter: Creamy peanut butter works best for swirling. If using natural peanut butter, make sure it is very well stirred so it does not separate or leave oily spots.
- Do not over bake: Pull the brownies when the edges are set and the center no longer jiggles. A toothpick should come out with moist crumbs, not completely clean.
- Let them cool completely: Gluten-free brownies need time to set, so let them cool before slicing for the best texture.
- Use certified gluten-free oat flour: If you need the recipe to be fully gluten-free, make sure your oat flour is labeled certified gluten-free.

Kirsten says
So good! I cannot do without sweets but I am trying to eat healthier and these hit the spot!