
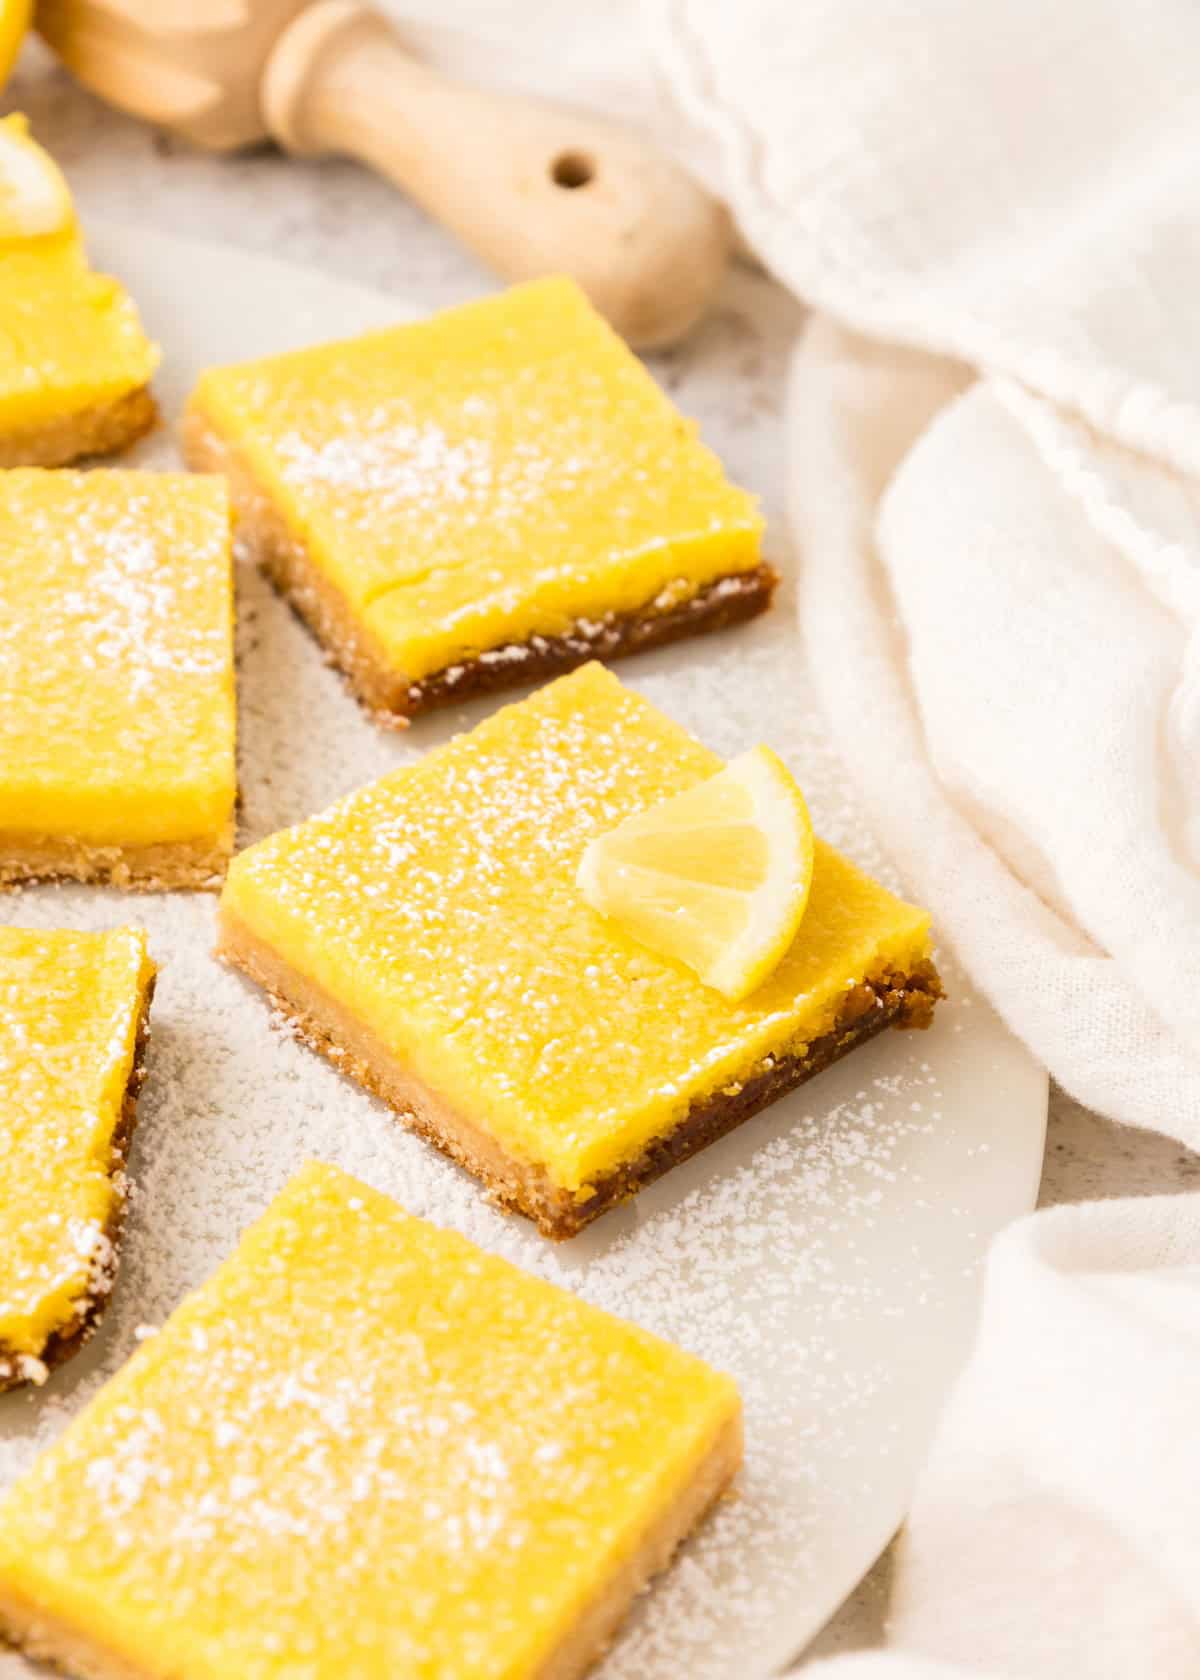
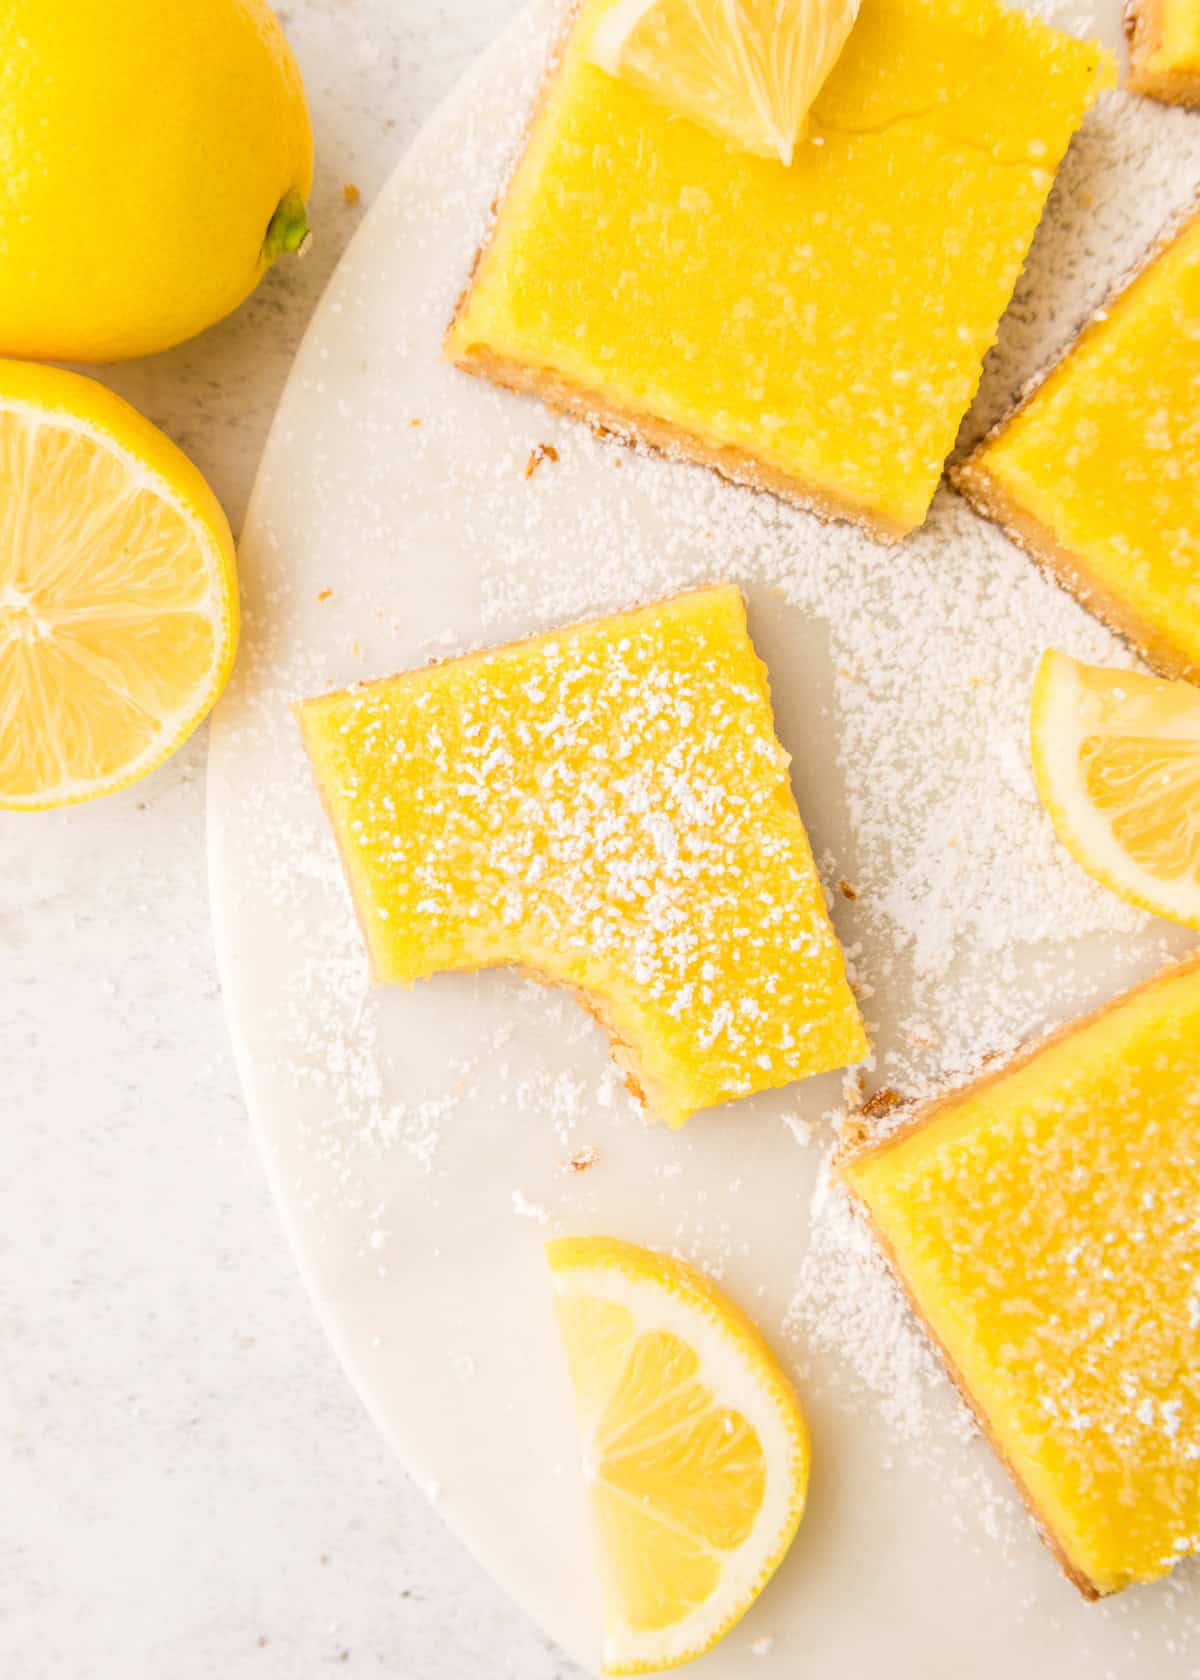
These Gluten-Free Lemon Bars are everything a classic lemon bar should be; fresh, tangy, lightly sweet, and perfectly sliceable, without the gluten or refined sugar. They have a buttery almond flour crust and a bright, silky lemon filling made with our homemade lemon curd.

A Quick Look at the Recipe
✅ Recipe Name: Gluten-Free Lemon Bars
🕒 Ready In: ~45 minutes + chilling time
👪 Serves: 12-16 bars
🍽 Calories: ~260 per bar (estimated)
🥣 Main Ingredients: Almond flour, coconut flour, butter, honey, lemon curd
📖 Dietary Info: Naturally gluten-free and grain-free
👌 Difficulty: Easy - simple almond flour crust with a smooth lemon curd topping
SUMMARIZE & SAVE THIS CONTENT ON
These Gluten-Free Lemon Bars may be healthier than classic lemon bars, but that doesn't mean they are complicated to make or use expensive complicated ingredients. There are only 6 simple ingredients in this easy recipe! Best of all, you can get the whole thing prepared and baked in about 40 minutes.
For more light summer dessert recipes try our Watermelon Sparklers, Strawberry Frozen Yogurt, or Strawberry Frozen Yogurt. They are all easy to make and healthy to eat!
Jump to:
- A Quick Look at the Recipe
- Why You'll Love these Gluten-Free Lemon Bars:
- Key Ingredients:
- Easy Substitutions & Variations:
- How to Make Gluten-Free Lemon Bars:
- Recipe Notes & Tips:
- How to Store:
- Gluten-Free Lemon Curd FAQs:
- More Gluten-Free Recipes You'll Love
- Get a FREE Healthy Meal Planning Ebook
- Gluten-Free Lemon Bars
Why You'll Love these Gluten-Free Lemon Bars:
Thick, Gooey Filling: For the most satisfying flavor and texture, we love using homemade honey lemon curd. Plus, you can save extra curd for future lemon desserts.
Gluten-Free & Naturally Sweetened: No white flour or refined sugar here! Instead of using traditional sweeteners, honey gives these bars a naturally sweet balance to the tart lemon filling.
Perfectly Tangy & Customizable: If you love an extra zing, add a little more fresh lemon juice or finish with lemon zest for an even brighter citrus punch.
A Little Sugar, If You Like: Since there's no refined sugar in the filling, you have some wiggle room to garnish with a light dusting of powdered sugar, lemon zest, or even thin lemon slices for a beautiful finish.
Key Ingredients:
- almond flour. Provides a rich, nutty base while keeping the crust tender. You can also use homemade almond meal.
- coconut flour. Helps absorb moisture and gives the crust a bit more structure.
- butter. Adds richness and helps bind the crust together. For a dairy-free option, use coconut oil.
- honey. Naturally sweetens the crust without overpowering the lemon flavor.
- lemon curd. Use homemade lemon curd for a silky, tangy topping.
Scroll to the recipe card at the bottom of this page for exact quantities.
Easy Substitutions & Variations:
- Use Store-Bought Lemon Curd: If you're short on time, you can replace the homemade lemon curd with a high-quality store-bought version.
- Swap the Sweetener: Replace honey with maple syrup for a slightly deeper flavor. For a lower-sugar option, use a liquid sugar-free sweetener that measures 1:1 with honey.
- Make the Crust Dairy-Free: Swap the butter for melted coconut oil or a dairy-free butter alternative.
- Add Lemon Zest: For an extra bright citrus flavor, mix 1-2 teaspoons lemon zest into the crust before baking.
- Berry Twist: Add a thin layer of raspberry or blueberry compote under the lemon curd for a fruity variation.
How to Make Gluten-Free Lemon Bars:
- Preheat the oven to 350°F. Line an 8x8-inch baking pan with parchment paper.
- In a bowl, mix almond flour, coconut flour, and salt. Stir in the melted butter and honey until a dough forms. Press the mixture evenly into the prepared pan.
- Bake for 12-15 minutes, or until the edges are golden.
- Spread the lemon curd evenly over the crust. Bake for 10 minutes to set the curd slightly.
- Let the bars cool at room temperature, then chill in the fridge for at least 2 hours before slicing.
Recipe Notes & Tips:
- Press Firmly for the Best Crust: The crust will be slightly crumbly, but it should hold together well when pressed. Press the crust evenly and firmly into the pan to create a sturdy base.
- Pre-Bake the Crust: Baking the crust before adding the lemon curd ensures it stays crisp and holds up under the filling. This step prevents a soggy bottom.
- Homemade Lemon Curd Tip: If making homemade lemon curd, let it cool slightly before spreading it onto the crust. This helps prevent the crust from becoming soggy.
- Chill for Best Results: These bars need at least 2 hours in the fridge before slicing. This helps the filling firm up and makes for cleaner cuts.
- Serving Ideas: A light dusting of powdered sugar, a sprinkle of lemon zest, or even thinly sliced lemons on top make for a beautiful presentation.
Save this Recipe
How to Store:
Refrigeration: Store in an airtight container in the fridge for up to 5 days. This keeps the lemon curd set and the crust firm.
Freezing: For longer storage, freeze for up to 3 months. To prevent sticking, place parchment paper between layers before sealing in a freezer-safe container.
Thawing: When ready to eat, thaw in the fridge overnight or for a few hours until softened. Avoid microwaving, as it can make the curd too runny.
Gluten-Free Lemon Curd FAQs:
Gluten-free lemon bars usually turn out runny when the filling hasn't fully set or the crust wasn't baked long enough. With this gluten-free lemon bar recipe, the lemon curd needs the full bake time to firm up, and the bars must chill for at least 2 hours before slicing. Chilling is essential because it allows the gluten-free crust and curd layer to set cleanly.
Yes, you can make gluten-free lemon bars with store-bought lemon curd as long as the curd contains real lemon juice, eggs, and butter. Using curd in a gluten free lemon bar recipe creates a smooth, reliable filling that bakes evenly and sets beautifully. Avoid curds with starch thickeners, as they can cause a gummy texture.
Almond flour works best in gluten-free lemon bars because it creates a tender, shortbread-like crust that holds up well under the lemon layer. A small amount of coconut flour helps absorb moisture and prevents crumbling. This combination gives gluten-free lemon bars the same structure and flavor as traditional lemon bars without using a gluten-free all-purpose blend.
Grab your free copy
Get a FREE Healthy Meal Planning Ebook
Tips, Tricks, and Recipes for Stress Free Meal Planning
Gluten-Free Lemon Bars
Ingredients
- 2 cups almond flour
- ¼ cup coconut flour
- ½ teaspoon salt
- ½ cup butter, melted
- ¼ cup honey
- 2 cups lemon curd
Instructions
- Preheat the oven to 350°F. Line an 8x8-inch baking pan with parchment paper.
- In a bowl, mix almond flour, coconut flour, and salt. Stir in the melted butter and honey until a dough forms. Press the mixture evenly into the prepared pan.
- Bake for 12-15 minutes, or until the edges are golden.
- Spread the lemon curd evenly over the crust. Bake for 10 minutes to set the curd slightly.
- Let the bars cool at room temperature, then chill in the fridge for at least 2 hours before slicing.
Nutrition
Notes
- Press Firmly for the Best Crust: The crust will be slightly crumbly, but it should hold together well when pressed. Press the crust evenly and firmly into the pan to create a sturdy base.
- Pre-Bake the Crust: Baking the crust before adding the lemon curd ensures it stays crisp and holds up under the filling. This step prevents a soggy bottom.
- Homemade Lemon Curd Tip: If making homemade lemon curd, let it cool slightly before spreading it onto the crust. This helps prevent the crust from becoming soggy.
- Chill for Best Results: These bars need at least 2 hours in the fridge before slicing. This helps the filling firm up and makes for cleaner cuts.
- Serving Ideas: A light dusting of powdered sugar, a sprinkle of lemon zest, or even thinly sliced lemons on top make for a beautiful presentation.


Kae says
These are so good, I love the crust!